The Switch Doc rebuilds his cat toy launcher with 3D printing
3D printing of MouseAir V2
I learned 3D printing as I designed the box. This led to many mistakes, wrong turns, and outright sizing errors. My very first attempt had a huge scaling error (Figure 9).
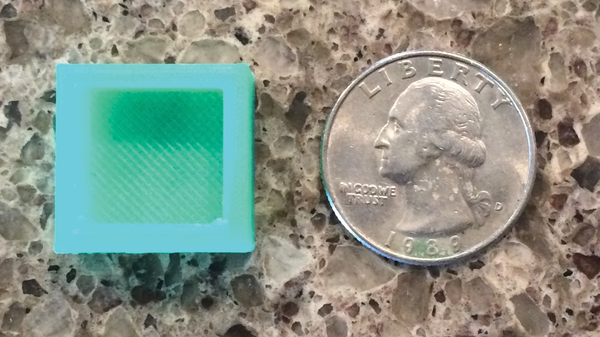 Figure 9: First 3D print attempt with scaling error.
I printed many different variations and learned something from most of them (Figure 10). The MouseAir top takes about seven hours to print, and the bottom takes about eight hours to print. This made fixing small problems very difficult and time consuming. I thought about it and came up with a good idea that lets me print only the section of the big print in which I am interested.
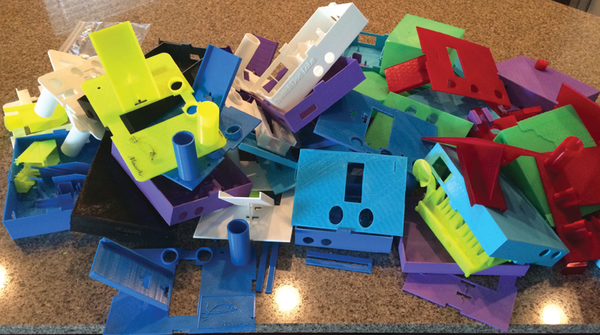 Figure 10: The 3D printer learning pile.
Debugging 3D Prints
When you have a complex design that takes hours to print, it can be frustrating to have to wait eight hours to see if you put the servomotor clip in exactly the right place. This caused me to have to print many extra boxes. The revelation that made this process turn around more quickly was simple: I take the whole box design (Figure 11) and then perform a difference with a cube, leaving only the part to print in which I am interested (Figure 12). The OpenSCAD code for this debug technique is shown in Listing 1.
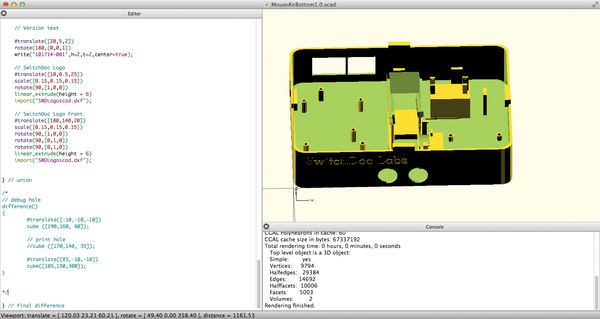 Figure 11: Full MouseAir V2 bottom box design.
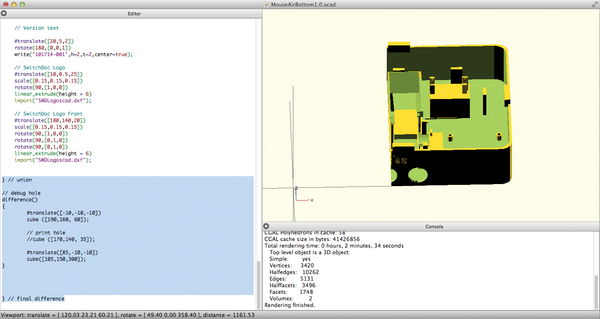 Figure 12: Bottom of the MouseAir V2 box with debug box applied.
Listing 1
Making a Difference
01 difference()
02 {
03
04         union()
05         {
06
07                 <your design>
08
09         } // union
10
11         // difference the debug hole
12         difference()
13         {
14                 #translate([-10,-10,-10])
15                 cube ([190,160, 60]);
16
17                 // print hole
18                 //cube ([170,140, 35]);
19
20                 #translate([85,-10,-10])
21                 cube([105,150,300]);
22         }
23
24
25 } // final difference
This idea dramatically reduced my time for testing design changes.
Buy this article as PDF
(incl. VAT)
Buy Raspberry Pi Geek
US / Canada
UK / Australia
Related content
-
Managing solar power systems with SunAir boards

A successful solar power project requires data analysis and the ability to modify the system to take advantage of prevailing weather conditions.
-
Protect your electronics from lightning strikes

Add a lightning detector to your vulnerable projects via the I2C bus to protect them from electrical storms.
-
SunRover Part 4 – Adding a Pi Camera and Diagnostics System

A Raspberry Pi Camera module and a diagnostics system allows SunRover to see and check that all systems are go.
-
MouseAir launches toy mice for the amusement of cats

In a valiant effort to entertain a certain black cat, the author creates a weapon of mass distraction. In the process, you learn how to use servomotors, solenoids, RFID readers, and more with the Raspberry Pi.
-
3D Slash CAD software works on a Raspberry Pi

Historically, Linux has not had many CAD offerings. Now 3D Slash has stepped in to fill the void, and it even works well on a Raspberry Pi.
