Create a customized, 3D-printed case for the Raspberry Pi
Design, Build, and Print
Anyone who has previously compiled a software package for the Rasp Pi has almost certainly encountered the three-step method configure && make && make install. The work involved in constructing a DIY case is organized in a similar fashion. The first step is to design the case. You can make pencil sketches and then create a cardboard model to determine realistically how much space you require.
At this point, you will need software support in the form of CAD (computer-aided design). Open software CAD programs will suffice for a simple DIY project. Such programs are easier to find for Windows users than for Linux users. For both operating systems, Tinkercad [2] is a good choice of tool for beginners, as long as you have a graphics card and web browser that are not too old. WebGL support is a requirement for this online tool.
After logging in to Tinkercad, you should be able to start designing right away, which is more or less intuitive to operate. Short videos introduce the software and its possibilities; fortunately, the learning curve is flat. As a result, working with this CAD software can be fun.
Objects created on the Tinkercad website can be both private and public. If you make your design public, other users will be able to copy and adapt it as they please. Autodesk, the 3D design company that owns Tinkercad, states explicitly in its conditions of use that it does not make any claim to user-created models.
Design Considerations
Tinkercad provides more than one way to achieve your goals. For example, the case I am working on could be constructed from a flat-bottom panel, to which I would then add side walls (Figure 3). Although less intuitive, it is less work and more elegant to create the case from a large solid box with the appropriate height and then cut out the interior in the form of a smaller box (Figure 4). This involves immersing the smaller box in the larger box and marking it as a "hole."
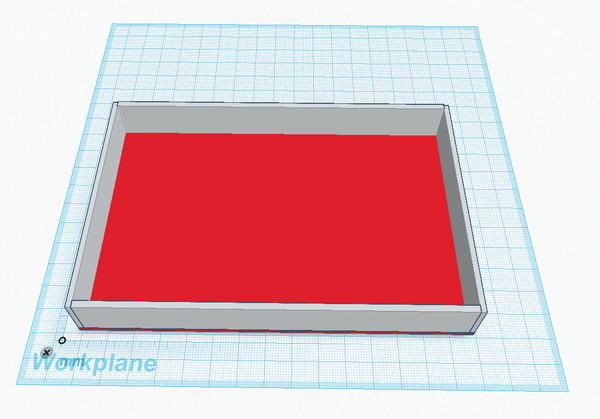 Figure 3: The Tinkercad online platform lets you create 3D models, such as a case from a flat panel and matching side walls.
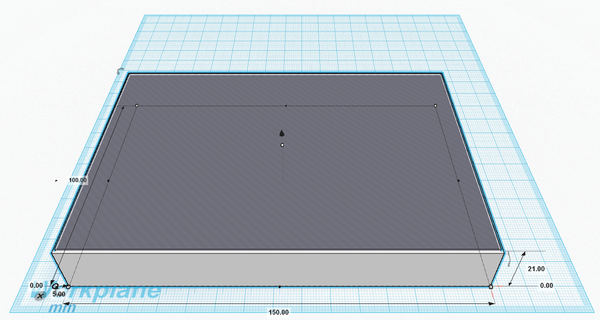 Figure 4: An alternative method of creating a case is to use the difference between two boxes, one slightly smaller than the other.
The result of either method will be identical. Tinkercad and its community make various shapes available for putting ever more complicated designs together. However, a few items are missing from the online service, such as standardized threads (e.g., for nuts, bolts, and screws).
If you have a Windows or Mac computer available for use, you should check out 123D Design, also from Autodesk, which offers more features. Instead of running in the cloud, this tool runs on your local computer, making for more fluid work than you might get with Tinkercad.
Buy this article as PDF
Pages: 6
(incl. VAT)
Buy Raspberry Pi Geek
US / Canada
UK / Australia
Related content
-
Turn a Rasp Pi into a print server with TurboPrint

Although the Raspberry Pi works well as a small printer server, the choice of drivers for the ARM processor is limited: ZEDOnet TurboPrint to the rescue!
-
3D modeling on the Raspberry Pi with FreeCAD

FreeCAD makes 3D modeling on the Raspberry Pi easy, even for beginners. A service provider prints the product.
-
The Switch Doc rebuilds his cat toy launcher with 3D printing

To explore the possibilities of 3D printing, we rebuild the cat toy launcher that debuted in Issue 5.
-
3D Slash CAD software works on a Raspberry Pi

Historically, Linux has not had many CAD offerings. Now 3D Slash has stepped in to fill the void, and it even works well on a Raspberry Pi.
-
Automating CUPS with shell commands
A Raspberry Pi is an ideal print server on a small network with the CUPS printing system controlled by a fully automated shell script.
