The Raspberry Pi (Rasp Pi) reduces the size of an entire computer to a format not much larger than a passport. However, the tiny computer usually needs additional equipment, such as a screen display, keyboard, and mouse. The pi-top [1] is a case that provides the Rasp Pi with a display, keyboard, and battery, thus converting the Rasp Pi into a mobile device (Table 1). In addition to the laptop version, the manufacturer also offers the pi-topCEED [2], which does not have an integrated keyboard or battery. This article takes a look at the laptop version of the pi-top.
Technical Data and Prices
| Component
| Specs
|
| pi-top
|
| Display
|
13.3 inches, WXGA, 1366x768 pixels
|
| Battery
|
51.8Wh, 10-12 hours run time
|
| Keyboard
|
UK or US layout, includes touchpad
|
| Memory
|
8GB microSD, class 10 (includes pi-topOS)
|
| pi-topCEED
|
| Display
|
14 inches, WXGA, 1366x768 pixels, matte
|
| Memory
|
8GB microSD, class 10 (includes pi-topOS)
|
| Unit
| pi-top
| Adafruit
|
| Prices
|
| pi-top (without board)
|
$264.99
|
$274.95
|
| pi-top (with RPi3)
|
$299.99
|
$314.91
|
| pi-topCEED (without board)
|
$114.99
|
n/a
|
| pi-topCEED (with RPi3)
|
$149.99
|
n/a
|
| Delivery costs
|
By destination*
|
$0
|
| * Shipping to Germany was ~$35 but would be significantly more for shipment to the US and less in the UK.
|
Delivery Disaster
Ordering the device online is straightforward. The case for the pi-top comes in bright green and a dark gray that actually appears black. Additionally, you have two keyboard layouts to choose from: UK and US English. Currently, the pi-top manufacturer delivers the kit together with a Rasp Pi 3 (RPi3) for $299. If the user already has a suitable Rasp Pi, then it is possible to order the pi-top minus the board for $264.99. The "desktop" model, the pi-topCEED, is much less expensive; it costs $114.99, or $149.99 with a RPi3. However, the pi-topCEED lacks a keyboard and battery because of the way it is constructed.
Payment is accepted by credit card. Shipping to me in Germany (from the UK) cost $35.00, which included customs duties. (If you are ordering from the US, you can avoid overseas shipping and customs charges by ordering the pi-top from Adafruit [3]; see Table 1.) Once the order is placed, you should receive a confirmation email with a link to the order status. Shortly thereafter, you receive a delivery date. Theoretically, this is how the order process is supposed to work. I did not get an email response, which was annoying and led to some confusion about how best to proceed. See the "Chaotic Ordering Process" box. It is a good idea to keep in contact with the manufacturer, if you order from them, to make sure that delivery goes well.
Once you place your order online, the pi-top shop indicates that an email will be sent to the customer with a link to confirm that the order has been received. Unless this confirmation goes out, pi-top will not process the order, even if payment has been received and a delivery date has been set. My confirmation email ended up somewhere in no man's land. I decided to follow up with the manufacturer when the delivery date passed, but the order status still hadn't changed.
Apparently, the manufacturer has assigned a single employee to send out the email manually that confirms receipt of the order. My email seems to have gotten lost in the shuffle. The company apologized for the delay and promised to send a small gift as compensation for any inconvenience. However, the company only delivers new devices at the beginning of each month. I had just missed the most recent delivery date, so I had to wait almost an entire month for the next delivery cycle. Unfortunately, delivery did not work the second time around either. I sent a reminder email, and thus yet another month went by before the device arrived.
Ultimately, the delivery was handled by DHL Express, but then customs stepped in and caused delays. Five days went by before DHL contacted me about this new snag in spite of my inquiries concerning the whereabouts of the package. As it turned out, customs wanted to compare the customs declaration with the billing statement. Once the necessary information was sent, it took another three days for the pi-top to arrive. The promised gift that had been included with the delivery was a brand new RPi3.
Setup and Assembly
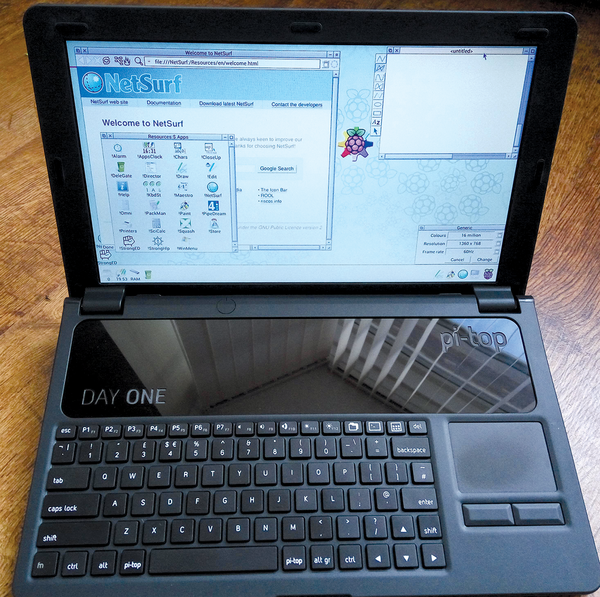
The pi-top arrived securely packed and intact. My first impression was positive, a good sign since the manufacturer doesn't get a second chance to make a first impression. A well-illustrated manual is included providing step-by-step instructions for assembly. The manufacturer pre-assembles the top part of the pi-top with the display, the bottom part with the battery, and the upper part with the keyboard. Therefore, the only thing you need to do is to put these parts together (Figure 1). Assembly for the pi-topHUB, a small board that handles power management and drives the screen, and the Rasp Pi is straightforward. All assembly tools and the necessary cables are included with delivery, and the instructions for their use are clear.
 Figure 1: When looking at the pi-top for the first time, it is hard to believe that a Rasp Pi operates on the inside.
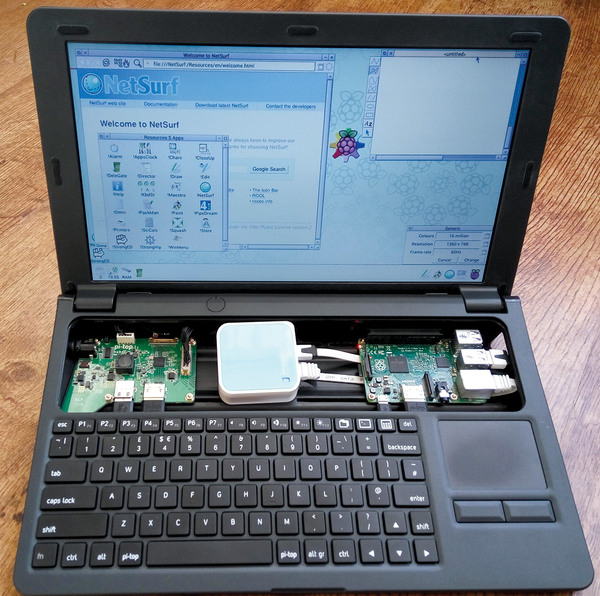
The GPIO extension port for the Rasp Pi is entirely taken over with a cable that leads to the pi-topHUB. Therefore, the GPIO pins are not available for external use. The pi-top team is already working on a solution to correct this issue. The Rasp Pi board is situated behind an opening in the case, thus allowing for external use of the two USB connections found at the edge of the board. In practice, however, many USB sticks prove too large for the case opening. As a result, an extension cable is often necessary when attaching USB sticks to the pi-top. The second USB jack can only be used internally. The keyboard occupies one of the two ports on this jack. The second port has space for a short USB memory stick or, as shown in Figure 2, a USB WiFi adapter.
 Figure 2: The hub board (shown on the left) connects the Rasp Pi via the GPIO to the components of the Rasp Pi laptop.
A tinted insert hides the Rasp Pi and all other components of the pi-top. Even so, the LEDs from the small computer shine through clearly. You can move the insert to the right at any time to gain access to the Rasp Pi, which allows you to do things like write a memory card. The device has an impressive and professional appearance in spite of its hobbyist origins. I took about 30 minutes to assemble the case and get the Rasp Pi laptop up and running.