Raspberry Pi as a Tor router and web filter
Configuring Raspbian
During the first boot, the raspi-config utility comes up automatically, which allows you to configure basic system settings (Figure 3). Select the menu option 1 Expand Filesystem to allow the operating system to access the entire memory on the SD card. The next entry (2 Change User Password) allows you to change the predefined password.
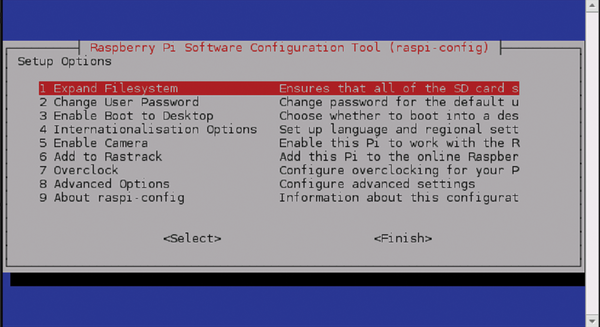 Figure 3: The utility program raspi-config starts during the first boot of Raspbian to facilitate initial setup.
The entry 3 Enable Boot to Desktop lets you determine whether or not Raspbian should boot into a desktop environment. Because this type of environment is not needed for the envisioned server usage and would merely consume resources, you should select the console option.
You may optionally use the entry marked 4 Internationalization Options to adjust the time zone settings and keyboard layout. To be able to reach the router without typing an IP address, you should use 8 Advanced Options to configure the host name – in this example, I have chosen the host name OnionRPG. By selecting Finish and then confirming with Reboot now, you will commit all changes.
In this example, I assume that your Raspberry is attached to your network via LAN cable, has obtained an IP address from the router, and is connected to the Internet.
Access Point
As root, you should first configure the Wi-Fi access point together with the DHCP server, which will later supply IP addresses to the Wi-Fi interface. Install the necessary software components as follows:
# apt-get update && apt-get install hostapd isc-dhcp-server tor
Next, enter nano /etc/dhcp/dhcpd.conf to call up the editor with the DHCP server configuration file and then comment out the following lines:
#option domain-name "example.org";
#option domain-name-servers ns1.example.org, ns2.example.org;
Remove the comment symbol (#) in front of the command authoritative; and append the configuration block from Listing 1 to the end of the file. Make sure to adjust the subnet according to your local setting. By pressing Ctrl+O and then Ctrl+X, you save the changes and exit from the editor.
Listing 1
Configuring /etc/dhcp/dhcpd.conf
subnet 192.168.42.0 netmask 255.255.255.0 {
  range 192.168.42.10 192.168.42.50;
  option broadcast-address 192.168.42.255;
  option routers 192.168.42.1;
  default-lease-time 600;
  max-lease-time 7200;
  option domain-name "local";
  option domain-name-servers 8.8.8.8, 8.8.8.4;
}
In the /etc/default/isc-dhcp-server file, the directive INTERFACES= lets the server know which interface should be used for assigning IP addresses. For the present scenario, enter the value wlan0. Then, assign a static IP address to wlan0 in the file /etc/network/interfaces (Listing 2) and activate it by invoking ifup wlan0.
Listing 2
Assigning Static IP Address
iface lo inet loopback
iface eth0 inet dhcp
allow-hotplug wlan0
#iface wlan0 inet manual
#wpa-roam /etc/wpa_supplicant/wpa_supplicant.conf
#iface default inet dhcp
iface wlan0 inet static
    address 192.168.42.1
    netmask 255.255.255.0
To get the Rasp Pi to function as an access point, the service in the /etc/hostapd/hostapd.conf file needs to be prepared accordingly (Listing 3). The value for wpa_passphrase needs adjusting as well; this is the password for signing into the Wi-Fi network later.
Listing 3
Preparing /etc/hostapd/hostapd.conf
interface=wlan0
driver=rtl871xdrv
ssid=OnionRPG
hw_mode=g
channel=6
macaddr_acl=0
auth_algs=1
ignore_broadcast_ssid=0
wpa=2
wpa_passphrase=<secret>
wpa_key_mgmt=WPA-PSK
wpa_pairwise=TKIP
rsn_pairwise=CCMP
To allow Upstart to load the demon automatically, enter the assignment DAEMON_CONF="/etc/hostapd/hostapd.conf" into the /etc/default/hostapd configuration file. To ensure compatibility with the latest Wi-Fi sticks, the developers of Onion Pi additionally recommend an update of Hostapd (Listing 4).
Listing 4
Adding Hostapd
# wget http://www.adafruit.com/downloads/adafruit_hostapd.zip
# unzip adafruit_hostapd.zip
# mv /usr/sbin/hostapd /usr/sbin/hostapd.ORIG
# mv hostapd /usr/sbin
# chmod 755 /usr/sbin/hostapd
After updating the access point software, you can start the two service components by invoking service hostapd start and service isc-dhcp-server start. To load both of them automatically during subsequent system starts, enter the commands update-rc.d hostapd enable and update-rc.d isc-dhcp-server enable.
« Previous 1 2 3 4 Next »
Buy this article as PDF
Pages: 6
(incl. VAT)
Buy Raspberry Pi Geek
US / Canada
UK / Australia
Related content
-
Creating a 3G hotspot with the Raspberry Pi

WiFi is available for free in so many public places that Internet access via a UMTS mobile cellular system would appear to be unnecessary. However, a Raspberry Pi with a UMTS stick can create a personal hotspot that creates independence from public WiFi networks.
-
Using your Pi as a VPN Gateway with an Access Point

Have you ever been told by a website that certain content isn't available in your country? Configuring your Pi to route all your network traffic through a VPN can help.
-
A Banana Pi-based router

The BPi-R1 is an attractive and affordable combination of switch, access point, and server. We look at how this Banana Pi-based router performs.
-
Use the Rasp Pi to log data from bicycles and motorcyles

University students take the Raspberry Pi to the streets, using it as a data logger for bicycles and motorcycles.
-
Backing up photos with the Raspberry Pi (Part 2)

Whenever you're traveling, there's always a chance you could lose your camera, so you should save your pictures as you go. The Pi image bank can save images and even display the pictures via a web server.
