Easy Street
Wire Lego Mindstorms

Lead Image © ingaclemens, 123RF.com
Wire Lego Mindstorms
The Lego Mindstorms components are very rugged, and because they work with standard Lego blocks, you can make some fun and amazing projects. Even if your Lego Mindstorms EV3 or NXT brick has died, all its sensors and motors will still work with your Raspberry Pi.
The Lego Windstorms EV3 and NXT components can be wired into your Rasp Pi (or Arduino) projects with the use of some custom adapters. If you are brave, you could cut one end off of the connector cables. Unfortunately, we didn't have any extra cables, so we took the safe route and used adapters; specifically, the breadboard version from Dexter Industries [2].
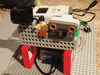
Using the following parts, we were able to make an automated streetcar (Figure 1):
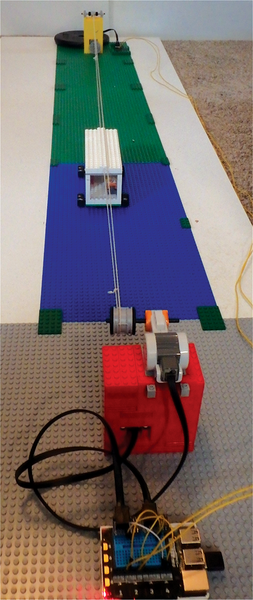 Figure 1: Streetcar overview.
Our goal for the streetcar project was to have two stations, each with a touch sensor that stopped the streetcar and made it switch directions. Station 1 had the motor, a touch sensor, and the Rasp Pi (Figures 1 and 2). Station 2 had a pulley wheel, a touch sensor, and a small breadboard that was wired back to the Rasp Pi at station 1 (Figure 3). The pulley string went above the streetcar and had to be kept quite tight so the pulley would not slip.
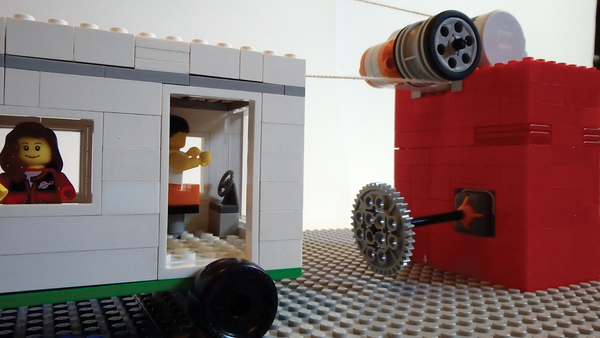 Figure 2: Streetcar station 1.
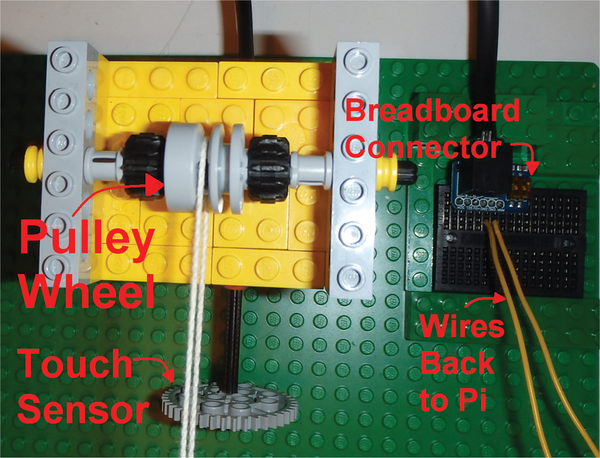 Figure 3: Streetcar station 2 looking down from the top.
All of the Lego Mindstorms wiring used the same pins, labeled "ANG" and "GND" on the left side of the connector. We used an Explorer HAT Pro to connect the Lego Mindstorms motor and touch sensors to the Rasp Pi (Figure 4). As we mentioned earlier, the station 2 touch sensor was wired into a small breadboard. From there, two wires connected it to the Explorer HAT Pro. For our setup, the station 1 touch sensor was wired on Explorer HAT Pro input 1, with station 2 on input 2.
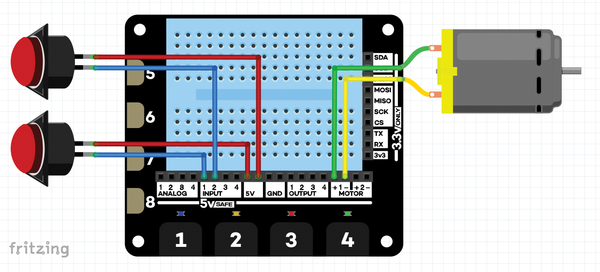 Figure 4: Raspberry Pi Explorer HAT Pro wiring, with the motor on the right and the touch sensors for station 1 (bottom) and station 2 (top) on the left.
Pages: 6
US / Canada
UK / Australia

BrickPi lets you build a Raspberry Pi into your Lego Mindstorms projects – you can even connect your Pi to Mindstorms sensors and motors.

Build an aerial tramway with a Lego Mindstorms NXT robotics kit and the MIT App Inventor web app, and control it remotely with an Android phone.

Enchanting lets you program your Lego Mindstorms robots in a language and environment based on Scratch.

Create super easy Pi programs to turn on lights, speak to you, or control motors.
By combining your Lego Mindstorms NXT, a Raspberry Pi, and some stuff from around the house, you can make some cool projects.

Price $15.99
(incl. VAT)