Using the Raspberry Pi as a smart alarm clock
Installing a Sound Card
An additional, external USB sound card is needed to play the alarm sounds, because the PWM generator ordinarily responsible for sound output is busy controlling the LED strip. Current versions of Raspbian include the kernel module used by most USB sound cards. As a consequence, you only have to modify two settings in the Alsa /etc/modprobe.d/alsa-base.conf file. With root rights, change the snd-usb-audio option from -2 to 1 (Listing 8). Using root rights again, you should append the contents of Listing 9 to the /etc/asound.conf file.
Listing 8
Modify Alsa Configuration
[...]
#options snd-usb-audio index=-2
options snd-usb-audio index=1
[...]
Listing 9
Append to /etc/asound.conf
pcm.!default {
  type plug
  slave {
    pcm "hw:1,0"
  }
}
ctl.!default {
  type hw
  card 1
}
To activate the USB sound card that has now been installed as the primary audio device, reboot the Raspberry Pi with sudo reboot. Then, you can connect simple loud speakers to the external sound card and call up alsamixer, which allows you to regulate the playback volume (Figure 3).
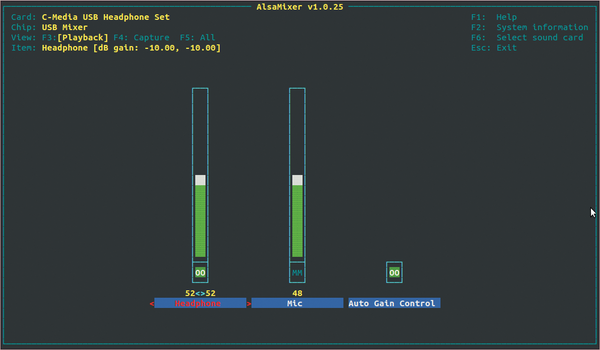 Figure 3: The Alsamixer lets you set playback volume.
The command-line tools mpg123 or ogg123 found in the vorbis-tools package are used to play the alarm tones on the alarm clock. Both programs were installed at the beginning of the project with the necessary build tools. The Rasp Pi alarm clock looks in ~/alarm/sound for music. Now, your DIY alarm clock is able to play music and control the lighting. The only thing missing at this point is a user interface.
Installing Services
The Rasp Pi needs a simple web-based administrative page for setting wake-up times, sounds, and lights. As a result, you must have a web server such as Apache, PHP as the script language, and MySQL as a database back end. After installing the services (Listing 10), you should call the web server either locally at http://localhost or from another computer via the IP address of the Raspberry Pi alarm clock. The simple message It works! indicates that this was successful. You should remember the root password for the database when installing the MySQL server. For security purposes, it should be different from the root password for the Linux system.
Listing 10
Install Services
$ sudo apt-get install apache2 php5 libapache2-mod-php5
$ sudo apt-get install mysql-server php5-mysql
The Rasp Pi alarm clock uses a small MySQL database to store data. After installing services, you need to install the database by copying the content of Listing 11 into the createDB.sql file and then submitting the file to the database via the following command:
$ mysql -u root -p < createDB.sql
Listing 11
Install Database
create database alarm;
use alarm;
create table alarm (
  id int not null auto_increment,
  ts timestamp,
  sound char(80) not null,
  light char(80) not null,
  primary key(id));
GRANT ALL ON alarm.* TO 'alarm'@'localhost' IDENTIFIED BY 'alarm';
FLUSH PRIVILEGES;
The SQL script creates an empty database named alarm that includes a table of the same name. Table 1 describes the structure of the database table. As a last step, the script creates one new SQL user in the database that the system will use later to access the data. The password requested when the SQL scripts are executed corresponds to the root password for the database rather than the password for the local root user.
Table 1
Database Table alarm
| Column | Type |
|---|---|
|
|
|
|
|
|
|
|
|
|
|
|
Buy this article as PDF
Pages: 8
(incl. VAT)
Buy Raspberry Pi Geek
US / Canada
UK / Australia
Related content
-
Using the PCF8583 as a clock component on the I2C bus of the Raspberry Pi

Semiconductor chips controlled by an I2C bus can be used in many applications. The PCF8583, an eight-pin clock and timer chip, is an interesting example.
-
Timed bootup of the Rasp Pi with a real-time clock

The Raspberry Pi has many amazing features, but it is missing a clock. We'll show how to add a real-time clock chip to your Pi.
-
Automating the home with the Raspberry Pi

The Raspberry Pi GPIO interface offers the perfect starting point from which to control devices, such as turning lights on and off, starting the coffee machine in the morning, or turning on the TV and playing your favorite movies at scheduled times.
-
Two LED projects for light and sound

Around Halloween last year, one parts order brought together two completely different projects: a light-up dress and a thunderstorm for a model train layout.
-
PiFace control and display

PiFace Control and Display makes it possible to build a variety of clever Raspberry Pi-based projects that require basic input and output. We help you to get started with this useful board.
