Automating the home with the Raspberry Pi

Lead Image © Leo Blanchette, 123RF.com

Morning Mood

The Raspberry Pi GPIO interface offers the perfect starting point from which to control devices, such as turning lights on and off, starting the coffee machine in the morning, or turning on the TV and playing your favorite movies at scheduled times.

Home automation is a natural application for the Raspberry  Pi. Imagine setting a desired wake-up time from the browser of your smartphone. Then, instead of listening to the nerve-wracking sounds coming from an alarm clock the next morning, the light in the room turns on, the smell of coffee wafts in from the kitchen, and the TV plays motivational videos.

In this article, I show you how to set up this paradise inside your own four walls.
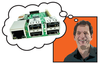
Parts

Before you begin, you need to gather the hardware components listed in the "Hardware" box. To create your morning assistant, you should set up a web server that can host the applications to be used in controlling the components you connect.

Hardware

  • Raspberry Pi with a USB power plug and SD card
  • Ethernet cable or WiFi stick
  • 433MHz transmitter module
  • 433MHz outlets for cordless communication
  • GPIO prototyping cable for experimental pinouts, solderless breadboard, and jumper wires [1] or
  • General purpose circuit board, soldering iron, and jumper wires
  • HDMI cable for HDMI-ready TV

After updating the repositories, install the components:

sudo apt-get update
sudo apt-get install apache2 php5

Next, from a computer in the local network, call the IP address of the Rasp Pi (see the "Rasp Pi IP Address" box) in the web browser (e.g., http://192.168.0.10). You should then see the start page for Apache – It works! – in the browser. This means the web server has been installed successfully.

Rasp Pi IP Address

If you do not know the IP address for the Raspberry  Pi, you can open a terminal from a computer on the network and type ifconfig. You will get a list of devices active in the network, including the IP address of the Rasp Pi.

Setting up the Transmitter

Figure 1 shows the kind of 433MHz transmitter module you will need [2]. To connect it to the Rasp  Pi, you need either a pair of jumper wires with a female connector for soldering or a solderless breadboard with male/male jumper wires. The pinout is relatively simple, as shown in Table 1.

Table 1

Connections

Transmitter

GPIO

ANT

GND

GND

DATA

17

VCC

5V

Figure 1: The Rasp Pi needs a 433MHz transmitter module to talk to the wireless communication outlets.

ANT is the antenna connection. If a transmitter has a coil, it does not need this connection because the coil acts as the antenna. GND is ground, DATA receives information from the device connected to the GPIO pin, and VCC is the supply voltage. Notice in Figure 2 that the GPIO number and the header pin number (preceded by a "P") are not the same; for example, GPIO17 is header pin P11.

Figure 2: Raspberry Pi GPIO header for revisions 1 and 2. If you have one of the new Raspberry Pi B+ computers, the Rev2 header pin numbers are correct. Notice that power and ground pins are scattered along the header.

Now all you have to do is connect the transmitter pins to the Rasp  Pi. To make the connection, either solder a transmitter pin on the general purpose circuit board to the jumper wire and plug a female connector to the correct GPIO pin or use male/male jumper wires on the solderless breadboard from the prototyping GPIO ribbon cable to the transmitter, which is also plugged in to the breadboard.

The Rasp Pi still needs the raspberry-remote software library to talk to the wireless communication outlets. You can download a copy of the source code for this software by first installing the git-core version control system on the Rasp Pi (Listing  1, line  1) then downloading the library source code (lines  2-4) and compiling it (line  5).

Listing 1

Getting the raspberry-remote Library

01 $ sudo apt-get install git-core
02 $ cd ~
03 $ git clone git://github.com/xkonni/raspberry-remote.git
04 $ cd raspberry-remote
05 $ make send

Buy this article as PDF

Express-Checkout as PDF

Pages: 4

Price $2.95
(incl. VAT)

Buy Raspberry Pi Geek

SINGLE ISSUES
 
SUBSCRIPTIONS
 
TABLET & SMARTPHONE APPS
Get it on Google Play

US / Canada

Get it on Google Play

UK / Australia

Related content