Enchanting Programs
Enchanting lets you program your Lego Mindstorms robots in a language and environment based on Scratch.

Lead Image © Ricky Corey, 123RF.com
Enchanting lets you program your Lego Mindstorms robots in a language and environment based on Scratch.
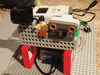
Enchanting is a free, open source programming language that allows you to program Lego Mindstorms NXT robots in a Scratch-like language. Many kids are familiar with Scratch, and we found we were able to start programming robots almost right away.
Enchanting [1] can be run in Windows, Mac OS X, or Linux. The Enchanting application can be downloaded from Canonical's Launchpad [2].The first time that you run Enchanting, it will need to reload the NXT firmware with LeJOS (a Java-based Lego NXT firmware). You'll see a warning message about possible problems during this process, although we loaded and unloaded the firmware many times without any issues.
We found that Enchanting had all the functionality that the Lego software had. The only exception was Bluetooth support for brick-to-brick communications. Some of the things we liked about Enchanting include:
[...]
Pages: 4
US / Canada
UK / Australia

Welcome to this issue of Raspberry Pi Geek!

BrickPi lets you build a Raspberry Pi into your Lego Mindstorms projects – you can even connect your Pi to Mindstorms sensors and motors.

Build an aerial tramway with a Lego Mindstorms NXT robotics kit and the MIT App Inventor web app, and control it remotely with an Android phone.

Wire Lego Mindstorms
By combining your Lego Mindstorms NXT, a Raspberry Pi, and some stuff from around the house, you can make some cool projects.

Price $15.99
(incl. VAT)