Touched Up
Display T. Box is a Raspberry Pi with a touch display in a compact case. The newest version of the Box comes with revisions that include a better touch screen and more speed.

Lead Image © Gal Amar, 123RF.com
Display T. Box is a Raspberry Pi with a touch display in a compact case. The newest version of the Box comes with revisions that include a better touch screen and more speed.
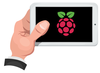
Often, users will hide a Raspberry Pi (Rasp Pi) behind a TV or inside a cupboard when they are using the single-board computer for an interesting project. However, direct access to the Rasp Pi might be necessary. For example, you might want to read output on the display or input data from a touch screen. The Display T. Box is suited to these and similar requirements with its well-designed case and integrated touch display [1]. The equipment includes a current Rasp Pi 3 (RPi3), a robust box, and a touch screen.
The Display T. Box 3 looks almost exactly like its predecessor, which was tested in a previous issue [1]. Even so, a few details point to changes under the hood. The openings for the Rasp Pi's LEDs have been lined up to match the location of the RPi3's LEDs (Figure 1). The cover has been notched out for the Rasp Pi SD card slot, so you can change memory cards without having to take the case apart (Figure 2).
A WiFi adapter is not included as part of the equipment because an RPi3 with WiFi built-in is running inside the Box (see Table 1). The 2.5A power supply meets the requirements for the RPi3. In addition to the power supply and the stylus, the Display T. Box comes with a short set of operating instructions. The Pro version of the Display T. Box, which is planned for future release, will include both a 64GB memory card and a set of cables for connecting the Box to a monitor or the Internet.
[...]
Pages: 6
US / Canada
UK / Australia
Display T. Box combines a Raspberry Pi 2 with an integrated touchscreen. The result is a complete mini-PC that can be used as soon as you supply power.
The new Rasp Pi display provides a compact option for viewing screen output – and it comes at a Pi-like low price of only $60.

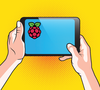
Typically, the Rasp Pi transfers video data via HDMI to a TV or screen. For mobile access, you can connect the tiny computer to a similarly small touchscreen instead.
The long winter nights are upon us in the northern hemisphere, so you won't find a better time than now to start a project with your favorite nanocomputer – and maybe even your favorite people.

We show how to get started with the Processing language on a Raspberry Pi 2 with a touchscreen.

Price $15.99
(incl. VAT)