Mining Code
Coder is an experimental environment for developing apps for the web on the Raspberry Pi. How easy does it make coding? Only one way to find out: Write a minesweeping game!

Lead Image © vician, 123RF.com
Coder is an experimental environment for developing apps for the web on the Raspberry Pi. How easy does it make coding? Only one way to find out: Write a minesweeping game!
According to its FAQ, Coder [1] "is an experiment [...] that turns a Raspberry Pi into a simple, tiny, personal web server and web-based development environment – just what you need for crafting HTML, CSS, and JavaScript while you're learning to code."
I'm not a fan of hype and always thought that just what I needed to code for the web is actually just what I had: a text editor with syntax highlighting, some autocompleting, and a browser to see how things are going from time to time. But, I've been wrong before, and maybe I'm missing out, so I decided to give Coder a spin. Maybe just what I thought I needed wasn't enough.
To begin, download the package [2] and unzip it. It unfolds into an overcomplicated tree of directories and files, but the only file you're really going to need is raspi.img, which is hanging off the main directory. That's the image of the operating system.
The rest is an unnecessary load of fluff. For some reason, the creators decided to pack Coder with an installer for Mac OS X and only Mac OS X, although on the project's page they link to instructions to install the image with what they call a PC (they really mean "Windows").
Apart from the ignorant mixup of operating systems and the hardware platforms they run on (and that, despite hipsterish protestations to the contrary, a Mac is, in fact, also a PC), where are the instructions for Linux? Coder is just a very slightly modified version of Raspbian and Raspbian is Linux, as are 99% of the systems that run on the Raspberry Pi. Is it too much to ask in this day and age to have instructions for the free community operating system that makes the Raspberry Pi a usable platform?
The thing is: Installing Coder from Linux is the most straightforward way of all. There's no faffing around with special programs or wizards. Just plug in your SD card and find what device name it has been given by listing the block devices:
$ ls /dev/sd*
It'll probably be /dev/sdb if you have one hard disk and no other block devices plugged in (you can check by using the above command before plugging in the card, then plug the card in, list the devices again, and note which device has been added to the list). Then, you can use dd to copy the image over, as in,
$ sudo dd if=raspi.img of=/dev/sdb
if your card is /dev/sdb. If you are a regular reader of this magazine, the above command should not be news to you.
According to the documentation, if you now insert your SD card and fire up your Pi, you're ready to go. Unsurprisingly, this is also wrong. You still have to go through the raspi-conf process (Figure 1), and for that you need to hook up your Pi to a monitor and keyboard. If you're going to be using your Pi only to run Coder (a waste of resources by any measure), you can just leave everything as it is and select Finish. Reboot, and now you should be able to access the Coder web interface.
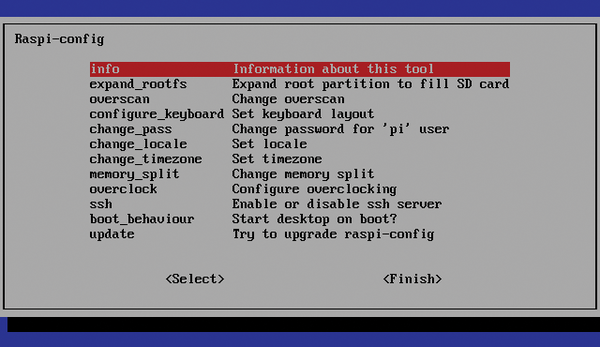 Figure 1: Despite what the official documentation says, you still have to go through the Raspbian first-time routine before being able to access Coder.
Accessing Coder is done through a web browser … or "Chrome" as the documentation will have it. Again, poppycock. Firefox, Rekonq, Opera, and any other modern browser will also do quite nicely, thank you very much. Type coder.local into the address bar, and you should reach the Coder landing page on your local server, where you are prompted to create a password.
The documentation also says that, if you're running Windows (no mention of Linux), you may run into trouble and you'll need to install Apple's Bonjour Print. This, yet again, is rubbish. All you need is the Pi's IP address, and you usually can do this by looking on your router or by again accessing your Pi and typing
$ /sbin/ifconfig
at the command line.
In my case, I see coder has been assigned 192.168.1.109. By inputting that into the address bar, I can access the platform with no need to install more useless junk on my system.
At last, I'm on the landing page. First impression and first weird design decision: Coder requests you to input a password to access the platform (see also the box "Accessing Your Pi"). That's fine except, when you do, the platform is locked to that one user and no other user can access it, at least not without knowing the unique password. Other users cannot even view the apps, let alone modify them. That's right: Not only does Coder not support multiple sessions for several developers working simultaneously, you can't even have several people using the same Coder sequentially. The FAQ does say that "[Coder]'s a private platform for building web programs," but I can't think of a good reason for not allowing you to share your work with other users. Maybe this restriction will be changed in future releases.
Accessing Your Pi
Once you've finished your Coder setup, to get into your Raspberry Pi, use pi as the username along with the password that you set for your Coder account. This also applies if you want to SSH into your Pi.
Once you're in, the main screen (Figure 2) is very Google-y. Although it's not decked out in primary colors, the big, bold, polychrome rectangles with white lettering have "Chocolate Factory" [3] written all over them. You have a sole icon in the menubar, a gear that opens Coder's main settings panel (Figure 3). From here, you can set up your Coder nickname, your real name, Coder's color scheme (which only changes the top bar in the main screen), and WiFi for your Pi, or you can change your password.
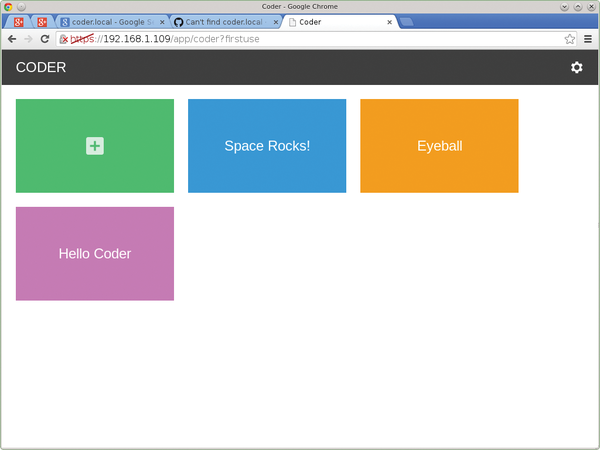 Figure 2: The main screen has a clear Google vibe.
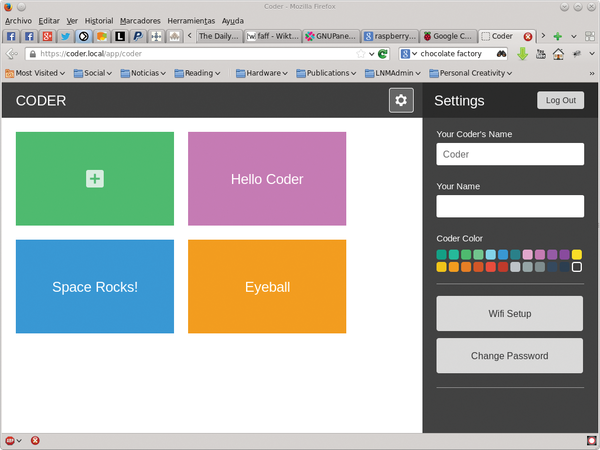 Figure 3: The gear icon opens a simple configuration panel for Coder's environment.
The really interesting bit, though, is the main workspace, which contains your apps, each represented by a brightly colored rectangle. Clicking on the rectangles launches the app. You can create or upload a new app by clicking on the rectangle with the plus sign. If you hover over an app's launcher, a </> appears in the upper right corner of the rectangle. If you click on that, the app will open in its development environment (Figure 4).
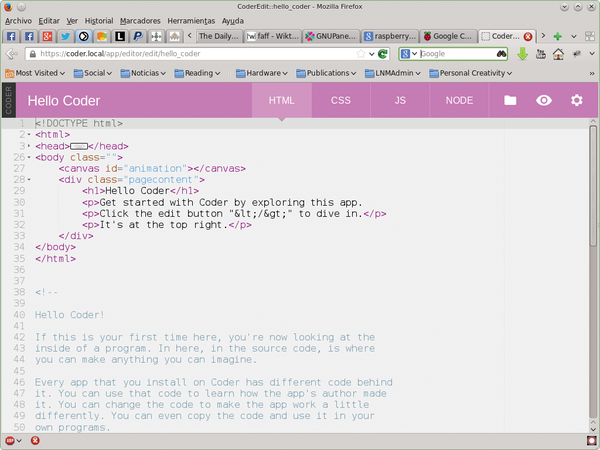 Figure 4: Clicking on </> opens the app in a development environment.
Pages: 7
US / Canada
UK / Australia

The remarkable Raspberry Pi has spawned a myriad of supporting projects – Android apps, program libraries, specialized Linux distributions, and an assortment of hardware accessories. The rapid changes within these projects is testament to the excitement and enthusiasm that developers around the world have given to the Raspberry Pi.

Replace a simple LED with more powerful and flexible BlinkStick devices.

This SwitchDoc column looks at various uses for the inexpensive ESP8266 WiFi/processor combination.

As its name implies, Pygame is a set of Python modules designed to write games. However, many Pygame modules are useful for any number of projects. We introduce you to a few Pygame modules that you can use to create custom graphical displays for your project.

An Arduino-compatible board combines cool audio features, 12 touch sensors, and electric paint to make the most excellent (and enjoyable) educational board yet.

Price $15.99
(incl. VAT)