Build cool stuff with littleBits, a Pi, and some Lego Bricks
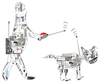
littleBits [1] are neat little electrical components that snap together magnetically to make electrical circuits. The littleBits electronics come collected into kits, or you can purchase the components individually. We decided to combine littleBits modules, including the Arduino module, with Lego Mindstorms building blocks and a Raspberry Pi to create a hybrid rover (see the "Rover Parts List" box).
SETUP
The steps for building the project were:
- Load the Arduino software onto a PC
- Load PuTTY [2], an SSH client, on the PC
- Build the rover base layer with the wheels
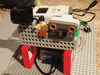
- Put the Rasp Pi, USB hub, and battery on the rover base
- Build the rover top layer
- Put the littleBits Arduino module and 9V battery on the top layer
- Connect the PC to the Arduino module with a USB cable to load and test the Arduino code
- Reconnect the USB cable between the Pi and the littleBits Arduino module
- Use PuTTY on the PC to load, test, and run the Raspberry Pi code
[...]
Buy this article as PDF
Pages: 6
(incl. VAT)
Buy Raspberry Pi Geek
US / Canada
UK / Australia
Related content
-
Make an Android phone app to control your littleBits projects

Make a remote control paddleboat with the littleBits Arduino module, DC motors, and generic Bluetooth module and control the boat with a phone app that uses the MIT App Inventor package.
-
Control your littleBits projects with a homemade wireless remote
Make a custom handheld wireless remote control with littleBits Wireless Transmitter and Receiver bits and slider, knob, button, or toggle bits.
-
Infinite Possibilities
The open hardware movement continues to add, improve, and reinvent itself. No sooner did the Raspberry Pi Model B+ come on the scene, than the Raspberry Pi 2 debuted, adding a "1" to the name of all Rasp Pis that came before. Faster, smaller, and smarter devices appear almost daily, inspiring makers as they address ever more diverse real-world problems.
-
Build cool stuff with Lego and Pi
By combining your Lego Mindstorms NXT, a Raspberry Pi, and some stuff from around the house, you can make some cool projects.
-
SunRover Part 2 – Solar Power Controller/Power System

Putting power in your robot is more than just running wires – you'll need to make sure the power supply doesn't cause interference that will disrupt other components. This article explores the problem of electrical noise and describes the design for a multiplexing solar power system.
