SunRover Part 4 – Adding a Pi Camera and Diagnostics System

Lead Image © Igor Vovgaliuk, 123RF.com

Rover Vision

A Raspberry Pi Camera module and a diagnostics system allows SunRover to see and check that all systems are go.
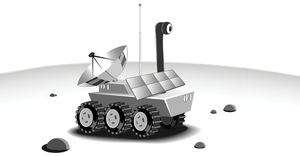
This article is the fourth in a series of articles on building a working solar robot. SunRover is a tracked, solar-powered robot designed to move around and explore while sending back reports, tracking weather, managing a tight power budget, and providing a platform for testing new sensors and equipment as they become available. The motors, the controllers, the computers, and the sensors are all complex devices in their own right.

In Part 1 of this series [1], I went through the motor controller/power system and described the mechanisms for connecting the I2C sensors throughout the robot. In part two [2], I redesigned part of the motor power system and then looked at the solar power charging system, which happily is working perfectly! Part 3 [3] covered the robot's navigation system, and here in Part 4, I look at the Pi Camera system and the I2C diagnostics system.

Camera System

In this project, I am using a standard Raspberry Pi Camera module as sold by the Raspberry Pi Foundation. This was the same camera I used in Project Curaçao [4], so I know it will handle the heat. The Raspberry Pi Camera module can be used to take high-definition video, as well as still photographs.

The module has a 5-megapixel fixed-focus camera that supports 1080p30, 720p60, and VGA90 video modes, as well as still capture. It attaches via a 15cm ribbon cable to the CSI port on the Raspberry Pi. This cable was too short for SunRover, so I bought a 50cm cable from Adafruit [5]. It's a little tricky to change cables, so be careful. I use the picamera [6] pure Python library for the interface to the Raspberry Pi Camera module.

The code needed to capture a single picture in Python using picamera is simple:

import time
import picamera
with picamera.PiCamera() as camera:
  camera.resolution = (1024, 768)
  camera.start_preview()
  # Camera warm-up time
  time.sleep(2)
  camera.capture('foo.jpg')

For all of you solar power fans, you need to know that the camera uses a lot of current (some report more than 280mA for video and about 150mA for still shots), even when the camera isn't being used. To fix this, issue camera.close(), and the power drops way down. Note that the example above does not use camera.close().

Base and Bubble

Using a 3D printer, I have built stands, prototypes, bases, and other accessories. The camera base was a natural fit for a 3D printing project. The base would be screwed onto the SunRover box, with a plastic bubble [7] (for water protection, primarily) sitting over the top of the camera that still allowed pan-and-tilt movements (Figure 1). The plastic bubble, although not perfect, has pretty good optics.

Figure 1: The Pi Camera in the bubble.

The friction-fit stand (Figure 2) has one layer of tape around the base to make it snug, with built-in cableways and slots to mount those boards that need light (color sensors, light sensors, etc.). I also wanted the pan-and-tilt mechanism to fit into the base with no screws.

Figure 2: Rasp Pi camera base.

To date, I have used the slots for two purposes: to mount the superbright LEDs for the camera at night and to mount a compass. Because reflections inside the bubble from the LEDs wiped out the camera image, I instead had to mount the LEDs on the side (Figure 3). The compass mount didn't work too well because it was too close to the pan-and-tilt motors.

Figure 3: Bright LEDs on the front of SunRover.

On the platform on the front of the robot, I mounted an ultrasonic distance ranger; I will mount the LIDAR laser sensor there in the future, too. Listing 1 shows code for the OpenSCAD platform model. As usual, it is a mixture of cubes, tubes, and blocks. Making similar shapes into modules, then invoking them multiple times, is a great way of reusing code.

Listing 1

OpenSCAD Platform Model

01 //
02 // SunRover Top Bubble Plate
03 // August 2, 2015
04 // SwitchDoc Labs
05 //
06
07 module platform()
08 {
09
10     // slot for LED or board
11   difference()
12   {
13     translate([25,-3,19.9])
14     #cube([4,6,5]);
15
16     translate([26,-3,21])
17     cube([1.50,8,10]);
18   }
19
20   translate([23,-10,0])
21   cube([10,20,20]);
22 }
23
24 union (){
25   difference()
26   {
27     union()
28     {
29       difference()
30       {
31         cylinder(h=20, r=72.00/2, $fn=100);
32         cylinder(h=22, r=69.55/2, $fn=100);
33       }
34
35       // base plate
36       difference()
37       {
38         translate([-75/2, -75/2,0])
39         cube([75, 75, 2]);
40
41                 // screw holes
42         translate([-68/2, -68/2,-5])
43         cylinder(h=10, r=2/1, $fn=100);
44
45                 // screw holes
46         translate([68/2, 68/2,-5])
47         cylinder(h=10, r=2/1, $fn=100);
48
49                 // screw holes
50         translate([68/2, -68/2,-5])
51         cylinder(h=10, r=2/1, $fn=100);
52
53                 // screw holes
54         translate([-68/2, 68/2,-5])
55         cylinder(h=10, r=2/1, $fn=100);
56       }
57
58        // camera pylon
59
60       difference()
61       {
62         cylinder(h=50, r=28/2, $fn=100);
63         cylinder(h=55, r=25.25/2, $fn=100);
64         // bar through for wires
65         translate([-6, -20, 2])
66         #cube([12,40,10]);
67
68         rotate(a=90, v=[0,0,1])
69         translate([-6, -20, 2])
70         #cube([12,40,10]);
71       }
72
73       // camera servo nib
74       translate([0,13.5,45])
75       cylinder(h=10, r=3/2, $fn=100);
76
77       translate([0,-13.5,45])
78       cylinder(h=10, r=3/2, $fn=100);
79     }
80     translate([0,0,-5])
81     cylinder(h=10, r=11, $fn=100);
82   }
83
84   platform();
85
86   rotate([0,0,90])
87   platform();
88
89   rotate([0,0,180])
90   platform();
91
92   rotate([0,0,270])
93   platform();
94 }

Buy this article as PDF

Express-Checkout as PDF
Price $2.95
(incl. VAT)

Buy Raspberry Pi Geek

SINGLE ISSUES
 
SUBSCRIPTIONS
 
TABLET & SMARTPHONE APPS
Get it on Google Play

US / Canada

Get it on Google Play

UK / Australia

Related content