IoT Dashboards
In the last issue of Raspberry Pi Geek we covered a simple IoT device using a I2C Sunlight sensor and a Raspberry Pi [1]. For this project we are going to be hooking it up to a couple of IoT Dashboards on the Internet for all to see our IoT device. This project focuses on hooking the device up to two IoT dashboards to make it accessible via the internet. This tutorial covers two different kinds of IoT dashboards. Both are free for non-commercial use.
An IoT Dashboard is a web-based software program that displays information about IoT devices and enables you to control them. These can be run and viewed on many different computers such as smartphones, tablets, PCs, smart watches and connected TVs. There are many commercial and non-commercial dashboard platforms available. IBM Bluemix [2] is considered the gold standard and is the most complex. Other platforms include InitialState [3], adafruit.io [4] and Freeboard [5]. This tutorial focuses on a combination of Freeboard and Pubnub [6], which are both based on the MQTT protocol [7]. Bluemix and adafruit.io also use MQTT.
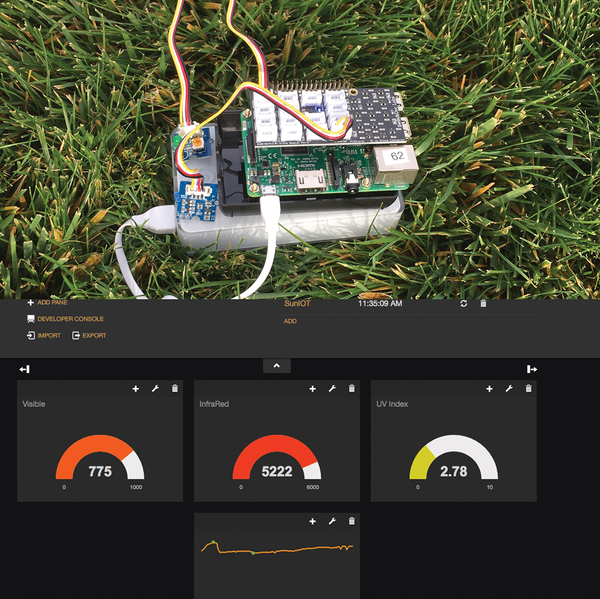 Figure 1: Completed SunIOT project and the Freeboard IoT Dashboard.
[...]
Buy this article as PDF
Pages: 5
(incl. VAT)
Buy Raspberry Pi Geek
US / Canada
UK / Australia
Related content
-
Raspberry Pi peer-to-peer communications

MQTT messaging controls multiple Pi music players from a smartphone.
-
IoT on Your Raspberry Pi

The SunIOT project attaches a Grove base unit with a light sensor to a Raspberry Pi to measure various components of the light spectrum.
