Using the Raspberry Pi to control digital information screens
The latest trend of digital signage involves distributing signs, announcements, and other information on digital screens instead of through billboards or printed information. These digital notices and advertisements are appearing all over – in streetcars, buses, shopping malls, universities, companies, city centers, and more.
If you would like to put together an info screen yourself, you will find that it's relatively easy and inexpensive to do. Aside from a monitor in the size of your choice, you will only need a Raspberry Pi, a few cables, and some free software.
Screenly OSE
The Screenly operating system provides a good foundation for a digital information screen. Two variations of the system are available: One is Screenly Pro, and the other is the open source edition known as Screenly OSE. I'll use Screenly OSE in this write-up.
[...]
Buy this article as PDF
Pages: 6
(incl. VAT)
Buy Raspberry Pi Geek
US / Canada
UK / Australia
Related content
-
The Pi Wire
Arduino’s “Invent Your Future” Contest; Fedora for Rasp Pi; New Raspberry Pi Kits for Windows IoT Core; micro:bit Education Foundation.
-
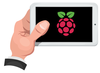
Testing the new Raspberry Pi touchscreen display
The new Rasp Pi display provides a compact option for viewing screen output – and it comes at a Pi-like low price of only $60.
-
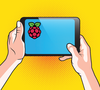
TFT touchscreens for the Raspberry Pi

Typically, the Rasp Pi transfers video data via HDMI to a TV or screen. For mobile access, you can connect the tiny computer to a similarly small touchscreen instead.
-
Blynk for Raspberry Pi

Use your Android device to build graphical interfaces for interacting with Raspberry Pi.
-
Display T. Box is a Raspberry Pi with an integrated display
Display T. Box combines a Raspberry Pi 2 with an integrated touchscreen. The result is a complete mini-PC that can be used as soon as you supply power.
