Precision
XBee modules let you take multiple sensors and build relatively uncomplicated wireless networks that a Raspberry Pi can then connect together.

XBee modules let you take multiple sensors and build relatively uncomplicated wireless networks that a Raspberry Pi can then connect together.
Wireless sensors have been used in home automation setups for a long time. However, the process of extracting useful information from a multitude of sensors all operating on one frequency can be challenging. The XBee modules from Digi International [1] utilize integrated protocols that can span large wireless networks and control communication among all of the components. Additionally, the modules can read sensor values from numerous ports and transmit the measurement data via the network to other XBee modules. As a result, they offer the ideal foundation for evaluating data from a sensor network with a Raspberry Pi.
XBee modules have been around for more than 10 years, and during that time, the product family has grown considerably in size. The protocol for the modules was originally based on IEEE 802.15.4-2003 and was intended for setting up simple connections between two partners or among networks that each had a central hub. The advanced ZigBee protocol [2] is built on top of this original framework and can handle mesh networks with complex message relays. XBee manufacturer Digi International also has added a robust and energy-efficient protocol, DigiMesh [3], to its product line.
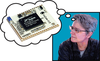
The XBee with its relatively small 1mW power capacity is fundamentally different from the more powerful Pro modules that, depending on applicable national and regional regulations, use up to 100mW for transmission. The Pro module has a wider transmission range and proves to be more robust for professional applications. Additionally, the modules have a variety of antennae. Printed circuit board (PCB) modules feature a flat antenna that has been soldered to the module. There is also a module with a short wire antenna (Figure 1) and a connector for an external antenna that can be used to improve transmission capacity or to direct the module antenna from inside the module cover to the outside.
[...]
Pages: 8
US / Canada
UK / Australia
Welcome to this issue of Raspberry Pi Geek!

The resourcefulness of private and commercial users has led to the creation of many practical and novel extensions for the Raspberry Pi. We provide an overview of some useful supplementary circuit boards.

Arduino's new Yún is a complete computer-on-a-chip, with WiFi access and a working version of Linux. We show you how to use Yún to manage a remote temperature sensor.

House plants are fairly self-sufficient, but they do need certain care from people to survive. With a few Arduino sensors and a little programming, you can take the guesswork out of watering your plants.

The Grove system's standardized connector and multitude of devices allow quick and easy project prototyping with your favorite small-board computers.

Price $15.99
(incl. VAT)