Stream Amazon Video in LibreELEC with InputStream
The practice of creating an entertainment center out of a low-cost Raspberry Pi (Rasp Pi) and Kodi, the free media center software package, has become widespread. The media center that emerges from this hardware/software combo can play media that is local or saved to network-attached storage (NAS). It also can easily stream videos from platforms like YouTube and Vimeo. Additionally, it accepts films streamed from a smartphone. The end result is that the Rasp Pi can turn any television into a smart TV.
Nonetheless, there is a small catch: This media center cannot connect with popular video on demand (VOD) services such as Netflix, Hulu, and Amazon Video. Previously, a suitable solution was available for Amazon Video. However, changes made by the service provider mean that the solution no longer necessarily works. The Kodi distribution LibreELEC [1] and Kodi's new InputStream interface have stepped into this void, thus making it possible once again to use Amazon Video with a Kodi Rasp Pi. Moreover, the new arrangement works even better than before.
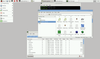
Kodi 17 "Krypton" is still a work in progress, but extensive modifications have already made themselves apparent [2]. Most noticeably, the interface has been completely overhauled (Figure 1). However, the true magic happens under the hood. Kodi 17 works with a new video player (Figure 2) that has an InputStream extension [3] for handling dynamic adaptive streaming over HTTP (MPEG-DASH) [4]. This paves the way for extensions like the Amazon Prime Video add-on to hunt for video signals with a decoder. The decoder unravels streams from Amazon, Netflix, and other providers that have been encrypted with Widevine [5].
[...]
Buy this article as PDF
Pages: 8
(incl. VAT)
Buy Raspberry Pi Geek
US / Canada
UK / Australia
Related content
-
On the DVD

NOOBS 1.9.2
-
On the DVD
NOOBS (New Out Of the Box Software) provides an easy way to install operating systems on your Rasp Pi.
-
On the DVD
The DVD enclosed with this issue comes with a collection of some of the best and most popular Raspberry Pi distributions.
-
Welcome

Our cover says "Boards Galore!", and we're not kidding. Last issue, we reviewed the LeMaker HiKey and the Banana Pi M3. This issue we add the Odroid-C2, Pine A64+, LeMaker Guitar, BBC micro:bit, and C.H.I.P. Each of these small-board computers (SBCs) have strengths and weaknesses, so you have to understand the needs of your project to choose wisely.
-
Making a smart TV with XBMC and a Raspberry Pi

For just a small amount of money, you can turn any television set into a multi-use, smart TV by adding a Raspberry Pi and XBMC. In this article, we will help you start out with the XBMC media center.
