Monitoring software for Raspberry Pi

Lead Image © antonino mirabile, 123RF.com

Watchful Eye

Keep an eye on your Raspberry Pi-based server with these nifty monitoring applications.

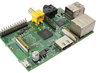
Turning a Raspberry Pi into a web or file server is relatively easy. However, if you decide to enlist your Rasp Pi for web and file serving duties, you should also consider deploying software that will help you monitor your server make sure it runs smoothly. In this article, I talk about several applications that can help you to monitor Raspberry Pi's vital statistics, such as CPU load, disk usage, network info, and much more.

PhpSysInfo

PhpSysInfo [1] is not designed specifically for Raspberry Pi, but this monitoring software works perfectly well on the little machine. Written in PHP, PhpSysInfo requires the Apache web server and PHP installed on your Raspberry Pi. Installing both packages is as easy as running

sudo apt-get install apache2 php5 libapache2-mod-php5

Deploying PhpSysInfo is not particularly difficult either. Grab the latest release of the software from the project's GitHub repository [2], unpack the downloaded archive, rename the config.ini.new file in the resulting directory to config.ini, and upload the entire phpsysinfo directory to your Raspberry Pi server. Make the phpsysinfo directory writable by the server using:

sudo chown www-data phpsysinfo/

Now, point your browser to http://<rasp-pi_IPaddress>/phpsysinfo, and you should see the application in all its beauty.

Although PhpSysInfo works fine right out of the box, you might want to tweak the application's default settings to get the most out of it. To modify settings, open the config.ini file in a text editor. You can change several parameters here. When you open the PhpSysInfo page in a browser, you will probably notice that it takes some time for the page to load. To speed things up, you can turn off JavaScript file compression by changing JS_COMPRESSION="Normal" to JS_COMPRESSION="None".

By default, the PhpSysInfo configuration displays all key information (Figure 1), but you can easily add more data points by enabling plugins in the config.ini file. To do this, locate the PLUGINS=false parameter and modify it as follows:

Figure 1: PhpSysInfo provides a wealth of information.
PLUGINS="PS"

This step enables the PS plugin, which shows a process tree of all running processes, and you can easily enable other supported plugins by adding them to the PLUGINS parameter.

In the DISPLAY PARAMETERS section of the config.ini file, you can specify the default language and template as well as configure the default display mode. PhpSysInfo can also monitor CPU temperature, and the application provides support for Raspberry Pi sensors. To enable this feature, locate the SENSOR_PROGRAM=false and edit it as follows:

SENSOR_PROGRAM="PiTemp"

The config.ini file contains a wealth of other parameters to tweak. Better still, each parameter has a brief description that helps explain what it does and how to configure it. Once you've finished tweaking the configuration file, save it and reload the PhpSysInfo page.

Android-toting users will also appreciate the PSIAndroid app, which can be used to view PhpSysInfo monitoring info on an Android device (Figure 2). The app provides a quick graphical overview of all key PhpSysInfo, and it can handle multiple PhpSysInfo installations. The app is essentially a one-trick pony, so it's very simple to use. All you have to do is to specify the URL of the PhpSysInfo installation, and you are good to go.

Figure 2: PSIAndroid app lets you access PhpSysInfo on the move.

All in all, PhpSysInfo has a lot going for it. It's easy to install and configure, it supports Raspberry Pi temperature sensors, and it even has its own Android client. In short, if you are looking for a comprehensive monitoring solution that doesn't require advanced skills to deploy, PhpSysInfo is just the ticket.

RPi-Monitor

PhpSysInfo is undeniably an excellent monitoring application, but the wealth of monitoring data can be overkill. In this case, you might want to opt for something more basic, like RPi-Monitor [4]. This simple application can give you just a quick overview of the key info, such as CPU load, memory and storage usage, network activity, temperature, and uptime. RPi-Monitor is distributed as a regular DEB package, and deploying it on Raspberry Pi requires only a few simple steps. To begin, install the required packages using the command:

sudo apt-get install librrds-perl libhttp-daemon-perl libjson-perl

Next, download the latest .deb package from the project's GitHub repository [5], install it, then update RPi-Monitor:

sudo apt-get update && sudo service rpimonitor update
sudo dpkg -i rpimonitor_x.x-x_all.deb

Once you've done that, point your browser to http://<rasp-pi_IPaddress>:8888 and hit the Start button, and you should see RPi-Monitor's interface.

Besides the basic info in the Status section, RPi-Monitor displays monitored resources as graphs in the Statistics section (Figure 3). RPi-Monitor doesn't have a mobile client app, but you don't really need one either: The application features a responsive interface that works equally well on small screens (Figure 4).

Figure 3: The Statistics section of RPi-Monitor features colorful graphs.
Figure 4: RPI-Monitor's responsive interface works well on small screens.

Although RPi-Monitor is not overloaded with features, it does have one clever trick up its sleeve. The application lets you add custom resources, so you can, for example, configure RPi-Monitor to monitor the disk usage of an external hard disk and display the collected data as a graph. The advanced usage and customization article [6] describes how to do that, along with a handful of other useful tricks.

Buy this article as PDF

Express-Checkout as PDF

Pages: 4

Price $2.95
(incl. VAT)

Buy Raspberry Pi Geek

SINGLE ISSUES
 
SUBSCRIPTIONS
 
TABLET & SMARTPHONE APPS
Get it on Google Play

US / Canada

Get it on Google Play

UK / Australia

Related content

  • Android Pi

    Your Android device can be a versatile companion for Raspberry Pi. We describe some useful apps to help you make this happen.

  • All the Pi

    Raspberry Pi users think small and dream big, imagining ingenious projects that put the unobtrusive Raspberry Pi to work on practical problems. And along the way, they learn things you don't ever discover by pointing and clicking with a smartphone or MacBook.

  • Creating a 3G hotspot with the Raspberry Pi

    WiFi is available for free in so many public places that Internet access via a UMTS mobile cellular system would appear to be unnecessary. However, a Raspberry Pi with a UMTS stick can create a personal hotspot that creates independence from public WiFi networks.

  • Access and control Raspberry Pi remotely with RaspCTL

    Need to access and control a remote Raspberry Pi machine? RaspCTL can help with that, and we show you how to deploy and use the software.

  • Monitoring Raspberry Pi temperatures

    Retrofitting a Raspberry Pi with a cooling element does not cost much; however, does the Rasp Pi really need one?