Controlling your Pi with an infrared remote
The Raspberry Pi is often hailed for its incredibly cheap price. Other low-cost development and educational boards are available (e.g., the Beaglebone), but for some of these systems, the additional peripherals that are required can quickly amplify the cost. The Raspberry Pi, however, is designed from the ground up to use accessories that are already freely available in most households. For example, the choice of either HDMI or RCA video connectors allows you to use almost any TV made in the past 20 years as a display. The Pi is also (for the most part) plug-and-play compatible with your existing computer hardware – mice, keyboards, wireless dongles – and it uses a 5-volt micro-USB power supply, which is the standard for most phones and tablets (apart from those made by Apple). So, many people will already have a surplus of these accessories available in their household.
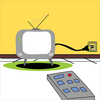
This article will allow you to unleash the power of yet another readily available household device – the infrared (IR) remote control. If you are anything like me, you have several of these in your home (Figure 1)! If you are not like me, then I have also covered using an IR receiver with a cheap, small, off-the-shelf IR remote.
Short History of IR and Remote Control
The earliest example of a remote control using radio waves is described in the 1898 US Patent US613809 by the brilliant Serbian-American engineer Nikola Tesla. The first commercial remote intended to control a television or consumer device was the "Lazy Bones" remote, developed in 1950 by the Zenith Radio Corporation. It was a very different beast from the intricate designs found today – it only allowed you to turn the television on and off and to change channels and was actually directly connected to the television using a wire – a serious trip hazard!
[...]
Buy this article as PDF
Pages: 8
(incl. VAT)
Buy Raspberry Pi Geek
US / Canada
UK / Australia
Related content
-
Raspberry Pi IR remote
Turn a Raspberry Pi into an IR remote control for your DSLR, TV, or any other device with an IR port.
-
Creating a child-friendly audio player with the Raspberry Pi

A Rasp Pi with a webcam and a few scripts creates a very nice, child-friendly media player.
-
Android Pi

Your Android device can be a versatile companion for Raspberry Pi. We describe some useful apps to help you make this happen.
-
Erratum: Remote Logic
Issue: Raspberry Pi Geek 03
Article: Infrared Remote
Page: 28
-
Pi video recorder with MiniDVBLinux

The Raspberry Pi is commonly used as a media center with programs like OpenELEC and Kodi. The Pi can also be used as an excellent video recorder.
