Working with the Raspberry Pi camera module
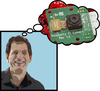
Motion Sensing and Video Streaming
An awesome piece of software called Motion detects movement in a series of images. Motion is written by Kenneth Lavrsen (and a number of others), and in the words of the creator, "Motion is a program that monitors the video signal from cameras. It is able to detect if a significant part of the picture has changed; in other words, it can detect motion." Motion is also a very useful tool for streaming the Raspberry Pi camera module output over the network.
Motion has been around for a while (since 2001). The official version of Motion unfortunately does not support the Raspberry Pi camera module, but luckily for us, the project has been forked and enabled for use with the Raspberry Pi camera module.
In the future, the official Motion build might support the camera module, but currently the forked project is the only one that will work. Before starting this tutorial, I highly recommend following the online instructions for using SSH [4] to familiarize yourself with SSH access to the Raspberry Pi. Also, you can follow an online tutorial [5] on how to enable SSH access with keys and disable password login.
SSH with keys is more secure especially when opening up access to your Raspberry Pi from the internet, rather than just from your home network. Lastly, I highly recommend accessing your router and assigning a static IP address to your Raspberry Pi based on its MAC address.
A very generic guide on how to set up a static IP address is available online [6]; however, if you want to find instructions for your specific router, I recommend searching for something like "ROUTER-MODEL static IP setup" on Google, where ROUTER-MODEL is the make and model information of your router.
First, open a Terminal window and make sure your Raspberry Pi is up to date (if you haven't done so already earlier in the article) using the following commands:
$ sudo apt-get update $ sudo apt-get upgrade
Next, download and install all of the dependencies required for Motion to function correctly:
$ sudo apt-get install -y libjpeg62 libjpeg62-dev libavformat53 libavformat-dev libavcodec53 libavcodec-dev libavutil51 libavutil-dev libc6-dev zlib1g-dev libmysqlclient18 libmysqlclient-dev libpq5 libpq-dev
The installation of the dependencies might take a few minutes. When the installation is finished, you need to download the tarball of the motion-mmal
file using the following command:
$ wget https://www.dropbox.com/s/xdfcxm5hu71s97d/motion-mmal.tar.gz
This command will download the tarball into your home/pi
directory (assuming you are running on a Raspbian system with a user name of pi
). You then need to make a new directory called motion-files
, move the tarball into this new directory, and unzip the tarball using the following commands:
$ mkdir motion-files $ mv motion-mmal.tar.gz ./motion-files $ cd motion-files $ tar zxvf motion-mmal.tar.gz
Once the tarball is unzipped, you should have two new files in your /home/pi/motion-files
folder called motion
and motion-mmalcam.conf
. The first (as the name suggests) is the Motion file, and the second is the configuration file, which you will need to edit. Before editing the configuration file, create a directory to output all of the images and videos. I will do this within the motion-files
folder. If you are not already in that folder, use cd /home/pi/motion-files
to get there. Then type the following command:
$ mkdir motion-output
Now you need to edit the config file to optimize it for the Raspberry Pi.
For the purposes of this example, I will use the nano text editor, but you can use whichever editor you like. Make sure you are in the same directory where you unzipped the tarball and then type the following command:
$ nano motion-mmalcam.conf
This command should open the configuration file in the nano text editor. You might need to put sudo
in front of the command if you do not have permission to edit this file. (If you downloaded it to your own user account, sudo
should not be necessary).
Once you have opened the file, I recommend changing the following parameters:
width 352 height 288 target_dir /home/pi/motion-files/motion-output
Once you have located and edited these three values, you can save and exit the file by pressing Ctrl+X, then pressing y
to save the changes and enter to confirm. (After you finish this tutorial, I recommend playing around with various aspects of the configuration file to get your implementation of Motion exactly as you desire.
The above settings are known to work well. The configuration file is very comprehensively commented, and the developer provides a very useful description of most of the commands to help get you started [7]. (Some of the commands that are specific to the Raspberry Pi build and are not listed in the command reference.)
An option that might be of particular interest (especially if enabling dynamic DNS and port forwarding later in the article) is to protect the camera stream with a username and password. You can add password protection by altering the following settings:
stream_auth_method 2 stream_authentication username:password
You could use an auth_method
value of 1, however using 2 is more secure. And obviously you need to replace the username
and password
with your desired login details.
The next step is to get Motion to run from boot. Again, I am assuming you are still in the motion-files
folder. Use the nano text editor to create some files that will enable you to start and stop Motion. Start by typing:
$ nano startmotion
This command will open a new file called startmotion
in the nano text editor. Enter the following code into the new file:
#!/bin/sh nohup /home/pi/motion-files/motion -n -c /home/pi/motion-files/motion-mmalcam.conf 1>/dev/null 2>&1 </dev/null &
Save and exit the file by pressing Ctrl+X, then press y
to save the changes and enter to confirm. Now create another file, which will hold the command to stop Motion. Type the following:
$ nano stopmotion
As before, this command will open a new file called stopmotion
in the nano text editor. Next, enter the following code into the new file:
#!/bin/sh ps -ef | grep motion-mmal | awk '{print $2}' | xargs kill
Save and exit the file by pressing Ctrl+X, then press y
to save and enter to confirm. You now need to make these files executable by using the following commands:
$ chmod +x startmotion $ chmod +x stopmotion
Finally, add the startmotion
command to the boot sequence, so that it starts automatically when the Raspberry Pi is booted up. Edit the /etc/rc.local
file using the following command (again using nano!):
$ sudo nano /etc/rc.local
In this file, you will see a line with the following text:
exit 0
On the line immediately before this line, you need to put the following code:
# start the motion service (runs as root) /home/pi/motion-files/startmotion
Save and exit the file by pressing Ctrl+X, then press y
to save the changes and enter to confirm. The stopmotion
file does not need to run on boot, but it is a useful command to have in order to easily stop the Motion service when needed. You can run it from the command line using:
$ sudo /home/pi/motion-files/stopmotion
If you want to restart Motion after stopping it, you can also use the startmotion
command in the same way:
$ /home/pi/motion-files/startmotion
As I mentioned before, Motion includes its own mjpeg streaming functionality, which is enabled by default in the configuration file. The default port for mjpeg streaming is port 8081, but you can change the port in the configuration file if you wish. Access the live stream by entering the IP address and port number into the address field of your webbrowser:
http://IPADDRESSOFPI:8081
where IPADDRESSOFPI
is the local IP address of your Raspberry Pi, which you can find by typing ifconfig
in a terminal window and looking for the inet addr
next to the eth0 or wlan0
entry. Hopefully, you already followed the advice to set this to a static IP, so that the address doesn't change every time your Raspberry Pi or router is rebooted.
Certain versions of Chrome are known to contain a bug causing mjpeg streaming to not work correctly, so I recommend using Firefox or the streaming functionality within VLC Media Player to open this stream. Streaming should also work from Safari and a number of more recent mobile devices, although I have not tested every option.
Setting up dynamic DNS
You might want to view this stream from outside of your local network, so you can monitor your security camera over the web from anywhere in the world. If you have a static WAN IP address already provided to you by your ISP, all you have to do is set up port forwarding on your router to forward port 8081 to your Raspberry Pi.
If your WAN IP address is assigned to you dynamically, then, in addition to forwarding port 8081 on your router to your Raspberry Pi, you will also need to set up a dynamic DNS service. No-IP [8] offer a free dynamic DNS service, including an easy-to-remember domain such as yourname.no-ip.biz or similar – much easier than having to remember an IP address.
First, you will need to visit the No-IP site and sign up for a free account. Once your account is set up, create a host such as youraccountname.no-ip.biz
with a host type of DNS Host (A) – you may need to enter any IP address here temporarily until the update client is installed.
Unless your router has the ability to send updates directly to the No-IP servers, you will need to download the Dynamic Update Client (DUC) on your Raspberry Pi. You can do this by following the instructions in No-IP's Knowledge Base [9] to download the DUC and get it set up. I would recommend setting it to update every 5 minutes.
You will then need to set it to run as a daemon by creating a file in the /etc.init.d
folder called noip2
. Type the following:
$ sudo nano /etc/init.d/noip2
Then enter the code in Listing 1.
Listing 1
No-IP Dynamic Update
01 #! /bin/sh 02 # /etc/init.d/noip2 03 04 # Supplied by no-ip.com 05 # Modified for Debian GNU/Linux by Eivind L. Rygge <eivind@rygge.org> 06 # Updated by David Courtney to not use pidfile 130130 for Debian stable. 07 08 # . /etc/rc.d/init.d/functions # uncomment/modify for your killproc 09 10 DAEMON=/usr/local/bin/noip2 11 NAME=noip2 12 13 test -x $DAEMON || exit 0 14 15 case "$1" in 16 start) 17 echo -n "Starting dynamic address update: " 18 start-stop-daemon --start --exec $DAEMON 19 echo "noip2." 20 ;; 21 stop) 22 echo -n "Shutting down dynamic address update:" 23 start-stop-daemon --stop --oknodo --retry 30 --exec $DAEMON 24 echo "noip2." 25 ;; 26 27 restart) 28 echo -n "Restarting dynamic address update: " 29 start-stop-daemon --stop --oknodo --retry 30 --exec $DAEMON 30 start-stop-daemon --start --exec $DAEMON 31 echo "noip2." 32 ;; 33 34 *) 35 echo "Usage: $0 {start|stop|restart}" 36 exit 1 37 esac 38 exit 0
Save and exit the file, make it executable by typing the following command:
$ sudo chmod 755 /etc/init.d/noip2
To make sure it is run correctly at startup and shutdown, run the following command:
$ sudo update-rc.d /etc/init.d/noip2 defaults
You can then restart your Raspberry Pi:
$ sudo reboot
Then, to check that DUC is running, you can type:
$ sudo noip2 -S
This command should give you an output similar to the following:
1 noip2 process active. Process 2945, started as noip2, Using configuration from /usr/local/etc/no-ip2.conf Last IP Address set xx.xx.xx.xx Account youraccntname configured for: host youracctname.no-ip.biz Updating every 5 minutes via /dev/eth0 with NAT enabled.
Some sensitive account information has been redacted in the preceding output, but you should see your latest WAN IP address and your correct account and host name. Once this step is complete, follow the generic instructions online [10] to set up port forwarding, or search Google for specific instructions for your router.
Buy this article as PDF
Pages: 2
(incl. VAT)