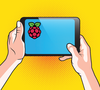
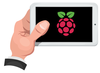
TFT touchscreens for the Raspberry Pi
One of the best features of the Rasp Pi is its graphics performance. Because of hardware acceleration, the Rasp Pi has gained areas of application that even much higher performance systems do not usually have. Not only is the graphical output good, but the small computer can silently work on its own as a headless server or control system.
Headless servers and control systems do not actually need a display screen. Sometimes, however, you might want to take a quick look at the current status or do a clean shutdown. These tasks can be performed remotely via SSH or a smartphone app, but they are easier to accomplish when a touchscreen has been connected. Likewise, other operations can benefit from real-life controls and the direct reporting of activities to the user.
A broad offering of touchscreens has become available for the Rasp Pi even for users who know nothing about soldering. For those who prefer a larger screen for something like a small jukebox, there is a 7-inch screen or larger. However, these screens usually need an additional board and their own power supply. Therefore, in this article, I focus on two smaller thin-film transistor (TFT) screens with a 2.8-inch format.
[...]
Buy this article as PDF
Pages: 6
(incl. VAT)
Buy Raspberry Pi Geek
US / Canada
UK / Australia
Related content
-
Display T. Box: The (second) third generation

Display T. Box is a Raspberry Pi with a touch display in a compact case. The newest version of the Box comes with revisions that include a better touch screen and more speed.
-
Testing the new Raspberry Pi touchscreen display
The new Rasp Pi display provides a compact option for viewing screen output – and it comes at a Pi-like low price of only $60.
-
Adapting to a small touchscreen monitor with PiMenu

Use PiMenu to build a menu-based graphical interface optimized for small LCD touchscreens.
-
Using the Raspberry Pi to control digital information screens

A digital information screen provides constantly updated information to viewers. All you will need to create one is a Raspberry Pi, the appropriate software, and a monitor.
-
Display T. Box is a Raspberry Pi with an integrated display
Display T. Box combines a Raspberry Pi 2 with an integrated touchscreen. The result is a complete mini-PC that can be used as soon as you supply power.
