Remote-controlled Arduino FM radio
Packaging the Project
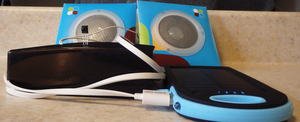
To make our radio project portable, we came up with two ideas. The first was to put all the electronics into a plastic container (Figure 4). For this we used a soap dish ($1) into which we drilled three holes. The first two holes were for the power and speaker cords. The last hole was for the IR receiver. To power our project, we used a solar charger [11] ($10), so we could listen to music outside.
 Figure 4: Electronics in a soap dish. Note the IR receiver poking out of the top of the dish and the solar charger to the right.
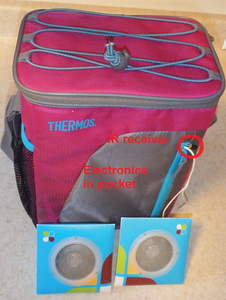
Our second idea was to place the electronics inside the pocket of a cooler bag (Figure 5). It is important to have the IR receiver poking out of the pocket.
Summary
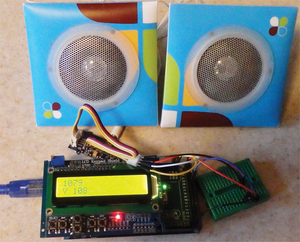
Not only was this project a lot of fun, we learned how to find IR codes and how to talk to an I2C device. In addition to the project we describe here, we also used a Raspberry Pi to connect with the FM receiver module and added an Arduino LCD shield to show and control the stations (Figure 6).
Some future ideas for this project that came to mind include sewing a wearable Arduino module into a backpack or jacket, scanning for radio stations, and reading back radio station information.
Infos
- Crystal set: https://en.wikipedia.org/wiki/History_of_radio#Crystal_sets
- I2C FM receiver module: http://www.dx.com/p/seeedstudio-i2c-fm-receiver-module-blue-395157
- IR receiver http://www.dx.com/p/diy-3-pin-infrared-ir-receiver-black-10-pcs-154184
- TEA5767 FM radio module: http://www.dx.com/p/tea5767-fm-radio-module-green-70-108mhz-239086
- TEA5767 module documentation: http://playground.arduino.cc/Main/TEA5767Radio
- I2C FM receiver wiki: http://www.seeedstudio.com/wiki/Grove_-_I2C_FM_Receiver
- I2C bus description: http://www.i2c-bus.org/i2c-bus/
- Wire library: https://www.arduino.cc/en/Reference/Wire
- RDA5807M chip description: http://www.electrodragon.com/w/images/5/5f/RDA5807M_datasheet_v1.pdf
- RadioLocator.com: http://radio-locator.com
- Solar charger: http://www.gearbest.com/mobile-power-bank/pp_15138.html
« Previous 1 2 3 Next »
Buy this article as PDF
Pages: 8
(incl. VAT)


