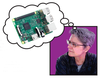
Blink Bling
Replace a simple LED with more powerful and flexible BlinkStick devices.
Lead Image © iimages, 123RF.com
Replace a simple LED with more powerful and flexible BlinkStick devices.
LEDs are great. Not only do they offer a simple way to add visual feedback and blinking goodness to your amazing Raspberry Pi projects, they are also ideal for learning electronics basics and mastering the art of GPIO programming. But, LEDs do have a few limitations. LED-based circuits are usually connected and controlled via Raspberry Pi's GPIO pins, which can be impractical for certain projects. Adding one or two LEDs to Raspberry Pi is relatively easy, but using a handful of LEDs in a project can prove rather difficult to wire, control, and troubleshoot – not to mention that the finished result may look rather messy.
Enter BlinkStick [1], a family of LED boards that connect to a USB port and can be easily programmed using your programming language of choice. Although BlinkStick products are more expensive than regular LEDs, they are more convenient to use, they can be deployed in seconds, they look good, and they are more flexible and easier to control. Additionally, both BlinkStick hardware and software are released under open source licenses. In other words, a BlinkStick board can be a perfect fit for your next Raspberry Pi project involving LEDs.
Born as a single relatively simple LED device, BlinkStick has evolved into several distinct products. Each BlinkStick model has unique characteristics that make it suitable for specific projects and purposes. So, it's worth checking out the features of each BlinkStick board before you opt for a specific one for your next project. All BlinkStick models have one thing in common, though: They feature bright multi-colored RGB LEDs that can be controlled individually.
BlinkStick Nano is the most basic and the least expensive model, and it lives up to its name. As small as a thumbnail, this board features two LEDs on each side and plugs directly into a USB port. This model is perfect for projects where size and neat design matter.
If two LEDs are not enough for your needs, consider BlinkStick Square. Slightly larger than the Nano model, it boasts eight multi-color LEDs. Unlike Nano, Square cannot be plugged directly into a USB port. Instead, this model has a micro-USB port, and you can use a regular data micro-USB cable to connect Square to the Raspberry Pi. Better still, a 3D-printed enclosure is available for BlinkStick Square, which can give your final project a nice finishing touch. Keep in mind, though, that the enclosure must be purchased separately.
BlinkStick Strip is similar to Square, but it has eight LEDs arranged in a row. This design makes it suitable for projects where LEDs are used to represent measurable values. A plastic enclosure is also available for Strip.
Finally, the BlinkStick Flex features 32 LEDs on a flexible strip with a sticky bottom, so you can attach it to practically any surface. You can cut the strip to the desired length and number of LEDs. The Flex model is ideal for projects on a larger scale, like adding ambient lighting to your workplace.
Several other products are available on BlinkStick's website, but these four should be enough to get you started.
All BlinkStick models are controlled using the dedicated BlinkStick Python package that can be installed using the Python PIP tool. If the latter is not already installed on Raspberry Pi, you can fix that using the following command:
sudo apt-get update && sudo apt-get install python-pip
Then, run the command below to install the blinkstick package:
sudo pip install blinkstick
By default, BlinkStick-related commands must be run with root privileges, but you can change that by issuing the sudo blinkstick --add-udev-rule
command and rebooting the Raspberry Pi. Now, plug your BlinkStick board into one of the Raspberry Pi's USB ports, and you are all set.
The first thing to do, of course, is to check whether the BlinkStick board works properly. Open the terminal, run the blinkstick --info
command, and it should detect the connected BlinkStick board and return its information (Figure 1).
Using several simple commands, you can control BlinkStick directly from the terminal. The blinkstick --set-color=COLOR
command, for example, sets the first LED on the board to the specified color. The actual COLOR value can be a named color (i.e., red
, yellow
, orange
, etc.) or hexadecimal values (e.g., 008000
, FF0000
, FFFF00
, etc.). The random
value picks the color randomly, whereas the off
value turns the LED off. By the way, the --set-color
parameter is optional. So, the blinkstick --set-color=COLOR
command can be shortened to blinkstick red
.
In most cases, you'd want to control other LEDs on the board, too, and the index=INDEX
parameter allows you to do just that. All LEDs on a BlinkStick board can be addressed by their index number, starting with 0
. The command below sets the third LED on BlinkStick Square or Strip to yellow:
blinkstick yellow --index=2
The LEDs on BlinkStick boards are very bright indeed, and the --brightness=LIMIT
parameter lets you control their intensity by specifying a limit between 0
and 100
, for example:
blinkstick blue --index=5 --brightness=50
Besides turning LEDs on and off, you can also make them blink, pulse, and morph from one color to another using the --blink
, --pulse
, and --morph
parameters, respectively. These parameters require color as their arguments, and both --blink
and --pulse
also need the --repeats=REPEATS
option, which specifies the number of times the LED blinks or pulses:
blinkstick random --index=1 --blink --repeats 3 blinkstick orange --index=5 --pulse --repeats 5
The --morph
option gradually changes from the current LED color to the specified one, and the --duration=DURATION
parameter defines the duration of the morphing process in milliseconds:
blinkstick green --index=7 blinkstick orange --index=7 --morph --duration=5000
The preceding commands, for example, set the color of LED number 6 to green and morph it to orange during five seconds.
Pages: 4
Price $15.99
(incl. VAT)